|

Ideas
This page is reserved for examples of great projects
you can do with your materials.
I will be having monthly crafting contests with the
winner receiving more crafting items!! YIPPEE!
|
|
|
Green Sneakers Tips &
Techniques Idea Page
Tips & Techniques:
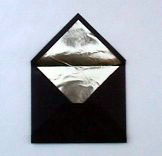
Photovelopes™
This section
shows you how to make Photovelopes™ using
photographs of family & friends and
|
  |
|
Materials Required:
-
- Photos of
family, friends, pets ......
- Glue
stick
- access to
local color copy center or
computer scanner
- deckle
scissors
- colored paper
|
|
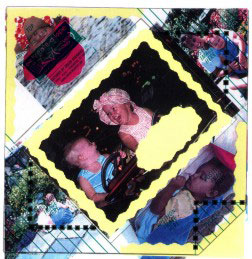 
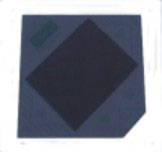
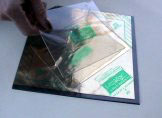
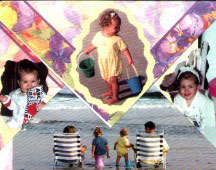
1. The
Sizing Template has "Overlap" Lines
and "Position Image Here" markings.
(In these photos they have been
digitally enhanced with black dots.)
Arrange your photos accordingly and
tack to a plain piece of paper. You
can either cut your photos or you
can arrange your photos so they
overlap each other. After your
photos are placed you can add frames
using colored paper and deckle
scissors. You can also use the
common technique of placing your
photos onto a background paper that
is larger than the photo. Also, if
you are going to send your envelope,
add an address area - it becomes
part of the photo copy. Note:
position the photos for the top &
bottom back flaps "upside down" so
when they are folded they'll be
oriented "right side up".
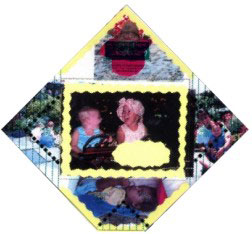
2.
After you make your copy, simply
follow the Kreate-a-lope® directions
for making envelopes. Note:
experimenting with a black & white
copy machine first is a cheaper
mistake if you make one.
3. If
you plan on using your computer to
make these kinds of envelopes,
you'll have to transfer the template
dimensions and guidelines to your
computer. |
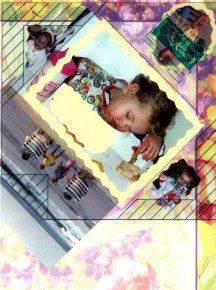 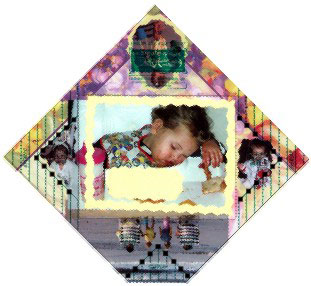
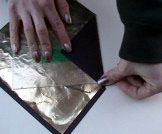
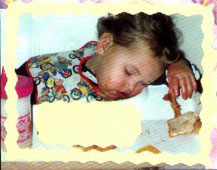
1.
This sample was set up a little
differently. The photos for the
top and side flaps were cut and
laid against a printed paper to
take advantage of the printed
pattern. Note the top & bottom
photos are "upside down" in the
layout, but are "right side up"
in the finished sample below.
|
|
|
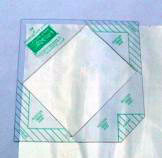
Tips & Techniques: Ironing
Tissue Paper
This section
shows you how to iron tissue paper to
freezer wrap - a great
way to create texture for making
.
|
Materials Required:
- Printed tissue
paper or printed napkin
- "Freezer wrap."
Also known as butcher paper. Not
wax paper - wax paper has wax on
two sides and will stick to your
iron (freezer wrap has wax on
one side).
- Iron
|
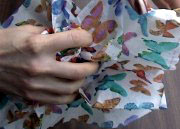 |
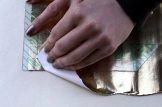
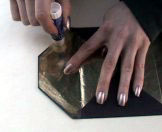
1. If
you want added texture, crumble the
tissue paper before ironing. |
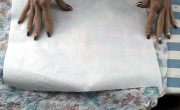 |
2. Place the shiny
side of the freezer paper on the
underside of the tissue paper. Note:
freezer wrap has wax on one side.
DON'T use wax paper as it has wax on
both sides and will stick to your
iron. |
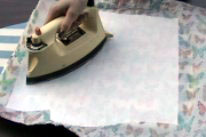 |
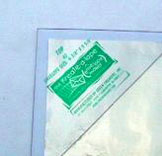
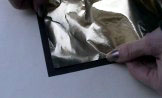
3. Gently iron,
using enough heat to bond the two
papers together. Note: 1) if you are
using a printed napkin that has
multiple layers (most are three
ply), be sure to separate the
printed layer from the others. If
you miss a layer, the printed napkin
will be separated from the freezer
paper and won't adhere when heat is
applied. 2) if you crumble the paper
in step 1 and you want to maintain
the texture, be careful not to press
too hard when ironing.
This technique is
great for use with
.
|
|
|
|
|
|
Right Column Box
 |
|
|
Headline |
|
|
|
Hours: O
P E N
O P E N
O P E N
We're here 24/7
It's going to be an exciting year! More items coming
in every day.
If you don't see what you wish, be sure to ask, I am glad to
special order items for you (and maybe carry them) just because YOU
ASKED!
My warmest welcome to my customers....I'm so glad you
stopped by. Be sure to grab a cookie as you shop....mine have no
calories! :)
Would you like to open a web store? Don't get stuck with a
solution that controls you. Ask and I'll direct you to an
easy, fun and reasonable solution!
|
|
|
|
|