Blue Top Navigation
Home Categories Search Products Ideas View Cart Contact Us   Home Search Contact Us


Beading & Jewelry

Clay & Sculpey

Cooking & Home

General Craft Items

Gifts

Metal Working

Paint & Crafts

Paper Crafts

Quilting

Sew. Knit, Crochet & Needlework

Scrap booking

Stamping - Embossing

Wood Burning

New Items


Ideas

This page is reserved for examples of great projects you can do with your materials. 

I will be having monthly crafting contests with the winner receiving more crafting items!! YIPPEE! 


Using LuminArte's Twinkling H2O's with your Rubber Stamps


From the desk of
Leslie Blackburn Ohnstad,
President Luminarte Inc.
 

Direct to Rubber : About the Technique

Direct to Rubber (or DTR) is the technique of applying Twinkling H20 color on the surface of a rubber stamp with a paintbrush.

The goal is to mix the product into a creamy texture a little thinner than toothpaste. If you have ever inked up a pigment pad the texture of the ink is creamy. A great test to try: Dip a paintbrush directly into a pigment re-inker bottle then brush it on the rubber stamp, feel the slight pull on the brush from the texture


Materials

  • Fine Mist spray bottle ( Hero Arts)
  • Paintbrush ( Art Institute #4 round)
  • 80 weight cardstock (linen is best)
    or good 90-140 weight watercolor paper

Rubber Stamps drastically vary in design styles and rubber depth. Training the eye to recognize and utilize the different design styles can have a huge impact on the outcome of your artwork.

Stamp manufactures “etched rubber depth” vary.

There are some designs in which the rubber is extremely shallow, for example stamps of old photographs usually face stamps. These stamps reap the cleanest impression when inked up with a brayer then stamped.

The rubber is so shallow tapping the ink, by hand, with an inkpad does not give a clean impression. Not the best rubber for the Twinkling H20’s.

Basically, the deeper the etching is in the rubber the crisper the image and the better chance for a good impression.

Types of Rubber Stamps
  1. Solid Stamp: The rubber is solid flat rubber. Embossing or inking this image would result in one solid color. However, brush on several colors of Twinkling H20’s and images of pears, leaves, apples and many others shapes will POP off the page.

Demo Tip This design style has no etched grooves in the rubber a single application of color will reap 1-4 colorful stampings.

  1. Tightly Illustrated: The lines or etching in the rubber are tight. If you were to emboss the image in black there is very little or no room to color in. Many leaves & botanicals have a tendency to be made in this stamp style: Penny Black Stampendous,& Hero Arts carry great images in this design style.

Demo Tip This design style has deep grooves in the rubber & will reap 8-27 colorful stampings

  1. Open “Outline” : These stamps we recommend embossing the image and color in the lines. Yes! Embossing the images prior to painting with Twinkling H20’s will give you the best results. There are multitudes of outstanding designs in this stamp style.
Demo Tip : Dye ink looks muted when used with any shimmering coloring medium. The lines become distorted. Twinkling H20’s are a watercolor and naturally resist the embossed lines so the outcome is crisp and clean.

 
Twinkling H2Os Tips and Techniques: Introduction to Twinkling H2Os

Twinkling H2Os are highly pigmented, lightfast, brilliant shimmering watercolors. The H2Os are non-toxic and archival safe. The amount of water used will determine if the color is opaque, translucent or transparent. The watercolor begins as a solid hard-pan cake. The traditional method used for this type of paint is to dip in a wet paintbrush to pick up
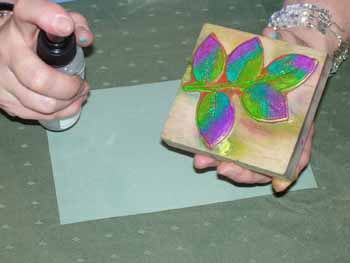
 color. However, we discovered a time saving tip:

Open the jars and wake up the colors by spray misting water on the surface of the paint cakes. Allow the water to soak in for 3-5 minutes. Mist a second time and wait a couple more minutes. The paint will soften and when you dip in a paintbrush it will easily mix into a creamy texture. You can paint freehand, create color washes, and use the Twinkling H2Os paints to color inside the lines of a drawing or 
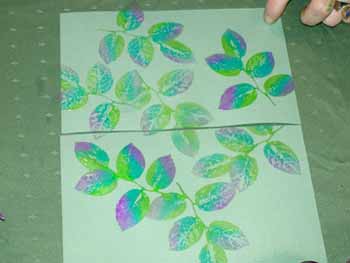
rubber stamped image. One of the most exciting techniques, Direct To Rubber (DTR), is explained below.

Getting Started with Direct To Rubber

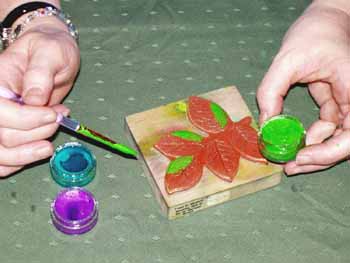
Begin with a dry stamp and dry paintbrush. If you are using the same brush to paint color onto a rubber stamp as you used to mix the paint to a creamy consistency you need to clean it, squeeze out the water, and start with it as a dry brush.

Dip your brush into the pot and roll the excess paint off the brush. Paint the color across the top surface of the stamp. Too much paint can fill in the design and create a blob of color when stamped. Try not to get color into the valleys and crevices of the stamp. After rinsing the paintbrush squeeze excess water out, keeping the brush dry.

Tips: 711026179790

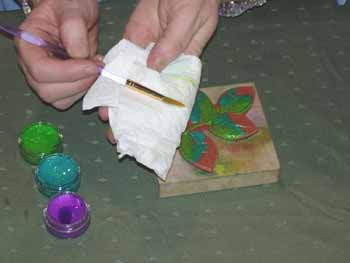
If you remember that you would not introduce water when inking a stamp with an inkpad it will help you to remember to use a dry brush when painting Twinkling H2Os onto the stamp. .For best results it is important to keep the consistency of the paint on your paintbrush and stamp creamy and smooth.

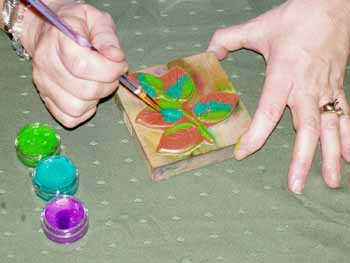
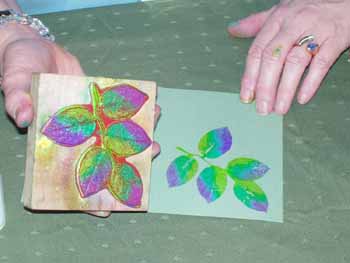
Once the image is colored, it is ready to stamp. If you have applied several colors to the stamp and some have dried it is not a problem. You can leave the stamp with Twinkling H2Os on the surface for a few minutes or much longer. Use the fine mist spray bottle to activate the colors and the stamp will not be damaged.

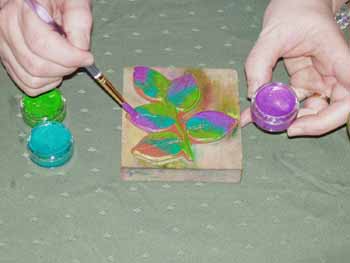
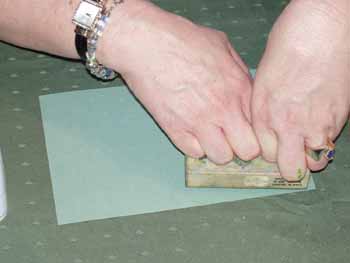
  • Always begin with your stamp on a flat surface, the image facing up. Gravity will take over and colors will run if you hold the stamp vertically or at an angle.
  • Hold the spray bottle 3 to 6 inches from the stamp, allowing the water to gently rain on the rubber. Lift the stamp, turn it over and stamp.
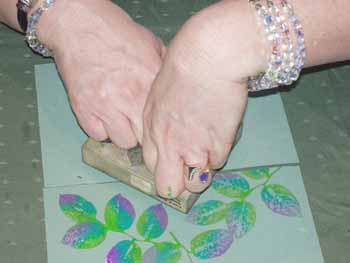
  • Mist again and stamp. Mist and stamp; repeat for multiple stampings until there is no more color.
  • Stamping a second time without re-misting is sometimes a good idea. Watch as you stamp and you’ll soon learn how much water to use.

Clean up is simple with Twinkling H2Os. Water is all you need to wash the color off your stamps.

Reminder: Allow cakes of paint to dry prior to putting the caps back on


Step # 1
Begin waking up colors by misting the jars with a fine mist spray bottle

 
Step #2
Paint the color across the top of the stamp. Too Much paint can fill in the design and create a blob of color when stamped.

 
Step #3
Each time the color is rinsed off the brush squeeze the excess water out keeping the brush dry and the paint consistency creamy on the stamp.

 
Step #4
Paint second color, applying at least three colors adds interest to your piece.

 
Step 5
Apply your 3rd color

 
Step 6
With the stamp image facing up lightly mist 6 - 8 inches away. Let the mist gently rain on the stamp.

 
Step #7
Now, Turn the stamp over and stamp

 
Step 8
The depths of the grooves of the rubber determine the amount of impressions achieved. This botanical stamp ( big Salai Branch) by Fred B. Mullett will give 12-18 impressions.

 
Step 9
Mist again then stamp. Mist and then stamp.

 
Step 10
Repeat process for multiple stampings till no additional color comes off....


Right Column Box

Headline

 Hours:

O P E N
O P E N
O P E N

We're here 24/7


It's going to be an exciting year! More items coming in every day. 

If you don't see what you wish, be sure to ask, I am glad to special order items for you (and maybe carry them) just because YOU ASKED!   

My  warmest welcome to my customers....I'm so glad you stopped by.  Be sure to grab a cookie as you shop....mine have no calories!  :)

Would you like to open a web store?  Don't get stuck with a solution that controls you.  Ask and I'll direct you to an easy, fun and reasonable solution!


Blue Bottom Navigation

t Privacy   t